Iris Flowers
Step 1
Water irises are not actually grown in water, but alongside it. They are more like bog plants than water plants because, though they can handle a few inches of water, they prefer wet soil to being submerged. Water irises are a lovely addition to the side of any pond or drainage ditch. They come in many colors and varieties, some hardy down to zone 4. Planting water irises is simple because they grow easily.
Step 1
Choose a variety of water iris that will survive in your climate. If you live in a cold area, choose a variety that is hardy enough for your winters.
- Water irises are not actually grown in water, but alongside it.
- Water irises are a lovely addition to the side of any pond or drainage ditch.
Step 2
Choose a spot for your water irises. All water irises need constantly moist soil and full to partial sun.
Step 3
Fill a pot that is flat and wider than it is tall with slightly acidic clay soil or aquatic potting soil. Do not use regular potting soil, because it is too light and will float away.
Step 4
Dig a hole 2 to 3 inches deep, and place one water iris rhizome in the hole. Cover the rhizome so it is just showing above the soil.
Step 5
Place pebbles over the top of the soil so it will not float away with the water.
- Choose a spot for your water irises.
- Place pebbles over the top of the soil so it will not float away with the water.
Step 6
Submerge the pot just to the point where the water covers the pot's edges and can flow in and out. Your water iris sprouts should be just above the water level.
Step 1
Find a sunny spot for your irises where they'll get direct sunlight at least six hours a day.
Step 2
Make sure the place has well-drained soil. To check this, soak the ground completely and time how long it takes the water to drain away. If puddles are standing five hours after you water, you should pick a different spot or amend the soil with compost.
Step 3
Dig up the flower bed thoroughly, to a depth of 4 or 5 inches. If you need to amend the soil, mix in enough compost to bring the level of the soil up 2 to 3 inches higher than it originally was.
- Submerge the pot just to the point where the water covers the pot's edges and can flow in and out.
Step 4
Dig individual holes for each Dutch iris bulb, 4 inches deep and 3 inches apart.
Step 5
Put each bulb in its hole, pointed side up.
Step 6
Cover each bulb with 4 inches of soil.
Step 7
Water the bulbs until the soil is soaked.
Step 8
Check on your irises every three or four days to see if they need more water. Stick your fingers in the soil to see if it's still moist. If it's drying out, water the bulbs until the ground is soaked.
- Dig individual holes for each Dutch iris bulb, 4 inches deep and 3 inches apart.
- Check on your irises every three or four days to see if they need more water.
Description
The thin, lance-shaped leaves of Dutch irises are 20 to 24 inches tall. The flowers are shades of purple, white or yellow. Some flowers are bicolor.
Placement
Dutch irises can be grown in a flower bed or in a mass planting. If left undisturbed, they will multiply and colonize the area where they are growing. Dutch irises can also be grown in containers.
Commercial Use
Dutch irises are grown as cut flowers because of the long, straight stems that hold the flowers. They should not be arranged in a vase with daffodils or narcissus due to a chemical interaction between the plants.
- The thin, lance-shaped leaves of Dutch irises are 20 to 24 inches tall.
- Dutch irises can be grown in a flower bed or in a mass planting.
Culture
Dutch iris bulbs should be planted in the fall in well-drained soil in full sun. The holes for the bulbs should be 6 inches deep, and 4 to 6 inches apart. They are hardy in zones 5 to 8.
Varieties
Although there are numerous color combinations of Dutch irises, some exceptionally beautiful varieties are the purplish-black "Tiger's Eye," the creamy white and yellow "Saturnus," and the deep blue "Imperator."
Fun Facts
Iris, the Greek word for rainbow, refers to the many colors of the flowers. The fleur-de-lis (Flower of Louis) is a stylized iris. It has been the symbol of France since the sixth century A.D.
- Dutch iris bulbs should be planted in the fall in well-drained soil in full sun.
- The holes for the bulbs should be 6 inches deep, and 4 to 6 inches apart.

Step 1
Choose a site with full sun, or that receives direct sunlight at least eight hours a day.
Step 2
Plant iris rhizomes 2 inches deep in sandy soil; in medium-textured soil, situate rhizomes just below the surface of the soil. In clay soil, plant iris rhizomes so their tops are even with the surface of the soil.
Step 3
Water iris in spring before they bloom to keep the soil moist but not sopping wet.
Step 4
Hand-pull weeds and other undesirable vegetation growing near the iris. Carefully loosen the soil around their roots with a garden claw. Remove faded flowers shortly after they finish blooming.
Step 5
- Choose a site with full sun, or that receives direct sunlight at least eight hours a day.
- In clay soil, plant iris rhizomes so their tops are even with the surface of the soil.
Step 6
Fertilize immediately after the plants finish blooming. Scatter approximately 1/2 cup of 5-10-5 fertilizer for every six iris plants. Healthy iris with rich, green foliage may not need supplemental fertilizer every year.
Step 7
Cut the leaves down to about 6 to 8 inches from the ground in early fall. Cut the flower stem off near ground level after the first hard frost.
Step 8
Mulch iris the first winter after planting to protect the newly planted roots from fluctuating winter temperatures. Use straw or hay and put down a 3- to 4-inch layer after the ground freezes in late autumn. In cold northern areas, iris will most probably require a protective winter mulch every year to protect the shallowly planted rhizomes from damage.
Step 9
- Fertilize immediately after the plants finish blooming.
- Mulch iris the first winter after planting to protect the newly planted roots from fluctuating winter temperatures.
Step 1
Gather the seeds, which are normally not available for purchase. You must collect the pods off the irises after they become plump in the spring.
Step 2
Remove the seeds from their pods and soak them in warm water for 24 hours.
Step 3
Sow the seeds in a flat planting tray in moist all-purpose potting soil, just below the surface. Put the tray in a black plastic bag and place it in the refrigerator for 3 weeks.
Step 4
Dig a hole outdoors in an area that is shady and is large enough in which to set the tray inside. Move the planting tray outdoors and place it in the hole. Cover the tray with glass.
- Gather the seeds, which are normally not available for purchase.
- Remove the seeds from their pods and soak them in warm water for 24 hours.
Step 5
Keep the soil moist and wait for the irises to grow. It could take up to 18 months for the seeds to germinate. Do not transplant the irises to your garden until they have grown for at least 2 years (after germination).
Step 1
Harvest iris flowers just the buds begin to open until the peak of open bloom for use in the home as cut flowers. Cut the flower stalk down at the crown of the plant and plunge into fresh, clear water immediately.
Step 2
Allow spent flowers to remain on the plant undisturbed to develop into seed heads in the fall. Cut the seed heads down at their base in the early spring to make way for new growth. Prevent seed heads from forming by deadheading fading iris flowers cutting the stem down at the crown of the plant and pulling the stem from the clump.
- Keep the soil moist and wait for the irises to grow.
- Allow spent flowers to remain on the plant undisturbed to develop into seed heads in the fall.
Step 3
Shear down the dead iris plant top foliage in the winter or early spring to make way for new green growth.
Step 4
Prune away iris foliage to control the shape and size of the plant clump as needed in the early fall after flowering.
Step 1
Combine powdered fish fertilizer, seaweed, Epsom salts, molasses and water in a bucket. Fish fertilizer contains all nutrients that the flowers need. Seaweed provides extra potassium for flower blooms, and molasses provides sugar for food along with iron and minerals.
Step 2
Stir with a stirring stick until well mixed.
Step 3
Pour mixture into watering can.
- Shear down the dead iris plant top foliage in the winter or early spring to make way for new green growth.
- Prune away iris foliage to control the shape and size of the plant clump as needed in the early fall after flowering.
Step 4
Wait until evening to water irises. Nutrient mixes poured over plants in the heat of the day may burn plants.
Step 5
Water irises until the ground is saturated. Two quarts of fertilizer will water a bed of irises that is 3 feet wide by 6 feet long.
Step 6
Fertilize irises just before blooming and again midway through the blooming cycle. Discontinue after blooming.
Tip
For irises planted in clay soil, add 2 tbsp. of apple cider vinegar to encourage roots to absorb nutrients.
Things Needed
- 2 tbsp. powdered fish fertilizer
- 1 tsp. Powdered seaweed
- 2 tbsp. molasses
- 3 cups water
- Bucket
- Stirring stick
- 2-gallon watering can
Varieties
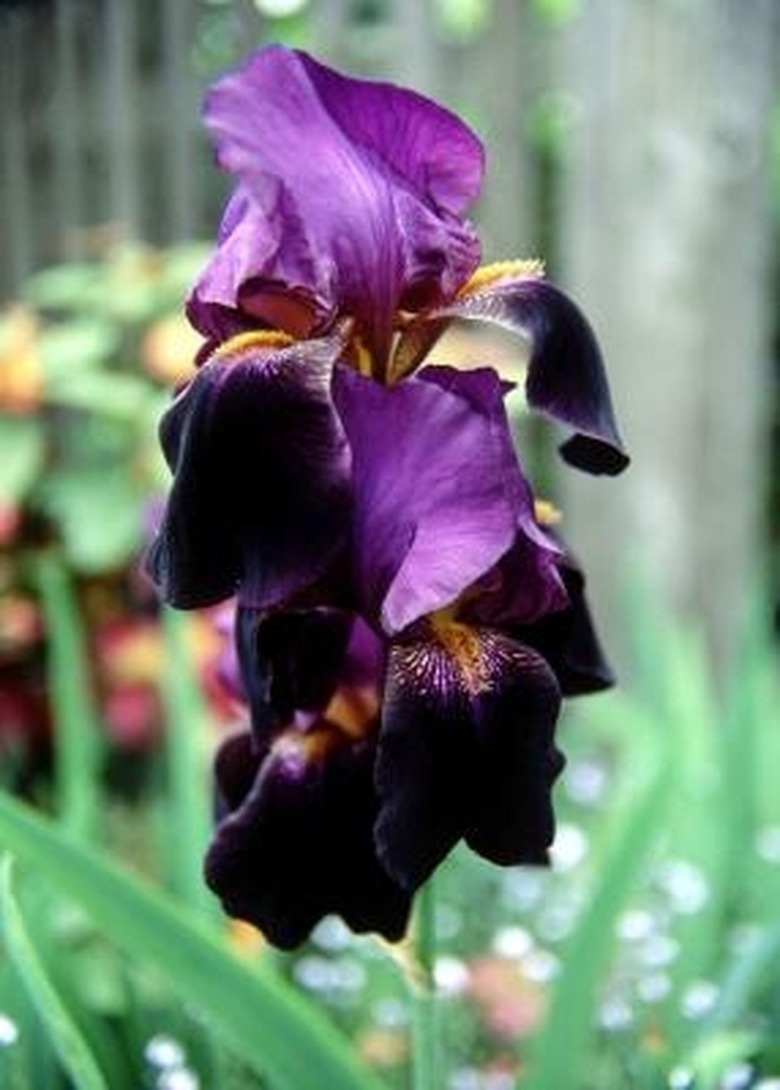
Common purple iris varieties include the lilac-colored Variegata, also called the Dalmatian iris, and the purple-black Before the Storm, a fragrant, mid-season bloomer. Other popular purples include the Dusky Challenger and the Purple Sensation.
- Wait until evening to water irises.
- Water irises until the ground is saturated.
Types
Purple irises are classified as either bulbous or rhizome irises. Bulbous irises usually produce smaller flowers than the rhizome irises.
Culture
Purple irises are widely adaptable and grow well in sunny locations with moist, well-drained soil. They generally thrive in USDA zones 3 to 10.
Features
Purple irises vary in height from as short as 8 inches to as tall as 5 feet. Most iris varieties bloom for two to three weeks in the late spring to early summer.
Uses
Purple irises are commonly used for borders in perennial gardens and as container plants. Irises are frequently used as cut flowers in colorful table arrangements.
- Purple irises are classified as either bulbous or rhizome irises.
- Purple irises are commonly used for borders in perennial gardens and as container plants.
Fun Facts
The purple iris is the state flower of Tennessee. The iris flower was named after the Greek goddess of the rainbow.
Step 1
Allow seedpods to mature on uncut stalks of existing iris plants. The pods typically reach maturity from mid- to late summer. Pods are ready for harvest when they partially turn brown, begin to crack open at the top and feel slightly dry to the touch.
Step 2
Place a paper or plastic bag over the seedpod and tie it shut with a twist tie or kitchen twine a few days or immediately before removing the mature pods from the iris plant.
Step 3
Cut the covered pods and several inches of stalk from the plant.
Step 4
- The purple iris is the state flower of Tennessee.
- Place a paper or plastic bag over the seedpod and tie it shut with a twist tie or kitchen twine a few days or immediately before removing the mature pods from the iris plant.
Step 5
Untie bags and dump seed pods and any loose seeds into a large bowl.
Step 6
Break the seedpods open and gently use fingernails or a fork to scrape mature seeds loose from the spongy material inside. Mature seeds should be glossy and dark brown.
Step 7
Lay clean seeds in a pie plate or tray and place in a cool, dry location without sunlight to dry for at least five to seven days.
Step 8
Store dried seeds in an envelope or airtight glass jar and label with the date and any hybrid information.
Step 1
Select a well-drained location that gets at least six hours of full sunshine a day. Plant your irises from August to September so they will be ready to bloom in the spring.
- Untie bags and dump seed pods and any loose seeds into a large bowl.
- Lay clean seeds in a pie plate or tray and place in a cool, dry location without sunlight to dry for at least five to seven days.
Step 2
Prepare the soil before plant your bulbs. Use a tiller to work down 12 inches into the soil. Mix 2 to 3 inches of peat moss, bark or compost into the soil.
Step 3
Dig a hole that is 4 inches deep and wide enough for the bulb to fit in. Bulbs should be planted about 8 to 16 inches apart to allow for spread.
Step 4
Place the iris bulb into the hole and cover with native soil. The top part of the bulb should be just below the soil surface. Plant with the point of the bulb facing upward.
- Prepare the soil before plant your bulbs.
- Use a tiller to work down 12 inches into the soil.
Step 5
Water with 2-to-3 of water immediately after planting. Water with 1-to-2 inches of water in the spring during the blooming period. Do not water while the plants are dormant.
Tip
Irises generally do not need to be fertilized. Adding peat or compost to the soil usually provides enough nutrients for the flowers. Do not plant your flowers in shade. Shade will prevent the flowers from blooming.
Step 1
Leave wilting flowers on the plants so the iris can develop seed pods. Avoid trimming or cutting the iris plant's flowers as you normally would to encourage more flower production.
Step 2
Wait for the seed pods to swell and ripen over the course of the summer. Do not touch, poke or prod the ripening seed pods.
- Water with 2-to-3 of water immediately after planting.
- Do not water while the plants are dormant.
Step 3
Collect the iris seed pods when they shrivel and turn a dark brown. The pod is ready for collecting when it feels hard to the touch and crackles easily when pressed. Use a pair of sharp scissors to snip the seed pod off the iris plant.
Step 4
Crack open the seed pod over a container. You will find several small seeds inside. Remove any of the glossy brown seeds. Black or white seeds are those that didn't form correctly and should be discarded.
- Collect the iris seed pods when they shrivel and turn a dark brown.
- Use a pair of sharp scissors to snip the seed pod off the iris plant.
Things Needed
- Scissors
- Container
Step 1
Remove the flowers as soon as they finish blooming. Pinch the spent flowers off behind the flower head and discard them.
Step 2
Remove the entire flower stalk once all the buds have opened and completed blooming. Cut the stalk off at the base where it emerges from the foliage, using a pair of sharp shears.
Step 3
Remove damaged or diseased leaves throughout the summer season. Cut off individual leaves at soil level. Remove only torn leaves, those that have discolorations or other signs of disease and those that are yellowing and drying out.
- Remove the flowers as soon as they finish blooming.
Step 4
Cut back the remaining foliage to the ground in fall after it yellows and dies back naturally. Die back usually occurs after the first frost.
Tip
Bearded iris flowers often bloom for only one day, so remove the spent flowers daily during the height of the blooming period.
Warning
Dark streaks on leaves are a sign of iris borers in the rhizomes, according to Ohio State University Extension. Borers infest the rhizome, so dig up the entire affected iris and dispose of the rhizomes so the borers do not spread to healthy plants.
The best time to separate iris bulbs is late summer or the beginning of fall, after flowering. This should be done at least every 3 to 5 years.
Step 1
Apply 1 to 2 lbs. of a general-purpose 5-10-10 fertilizer per every 100 square feet of iris bed prior to planting. Work the fertilizer into the top 6 to 8 inches of soil one week before planting.
Step 2
- Cut back the remaining foliage to the ground in fall after it yellows and dies back naturally.
- of a general-purpose 5-10-10 fertilizer per every 100 square feet of iris bed prior to planting.
Step 3
Fertilize once the flowers open the first summer after planting with 1 lb. of 5-10-10 fertilizer per every 100 square feet. Work the fertilizer into the top 3 to 4 inches of soil around the perimeter of the plant, taking care not to get fertilizer in contact with the roots or foliage.
Step 4
Water the iris thoroughly after fertilizing, moistening the top 6 inches of soil. Immediate irrigation washes the fertilizer down into the root zone of the iris.
Step 5
Feed established iris once a year, either in spring when new growth begins or in summer after the plants bloom. Apply 1 lb. of 5-10-10 fertilizer per every 100 square feet, taking care to keep the fertilizer off the plant's roots.
Step 6
- Fertilize once the flowers open the first summer after planting with 1 lb.
- Work the fertilizer into the top 3 to 4 inches of soil around the perimeter of the plant, taking care not to get fertilizer in contact with the roots or foliage.
Store iris bulbs for up to three months in a cool dry area. Some may survive winter storage, but growth and blooming will be inhibited.

Iris bulbs can be forced inside to bloom in a glass centerpiece without soil. Nestle the iris bulb in some pebbles or glass marbles placed in a glass container. Pour enough water into the container so the water just touches the root plate on the bottom of the bulb. Do not immerse the bulb in water.
Step 1
Choose a garden spot that gets at least 6 hours of full sun per day and has good drainage. Prepare the garden bed by adding low nitrogen fertilizer and organic material and mixing thoroughly into the soil. Make sure that the soil is lose and will not compact easily.
- Store iris bulbs for up to three months in a cool dry area.
- Iris bulbs can be forced inside to bloom in a glass centerpiece without soil.
Step 2
Dig shallow holes just big enough for the rhizome. Each hole should be 18 inches apart. Smaller varieties should be 10 inches apart. They should be planted no more than 3 inches down in the soil with the crowns pointing up. Cover them loosely with soil.
Step 3
Moderate watering is necessary to keep the soil moist. After blooms are finished, cut the foliage to just above the soil. In the fall place mulch over the plants to protect them from frost.
- Dig shallow holes just big enough for the rhizome.
- Each hole should be 18 inches apart.
Varieties
Step 1
With more than 200 varieties of irises available, at least one is suitable for almost every yard or garden. Since they all have the same basic needs, personal preference is all that matters.
Planting conditions
Step 1
Iris require well-drained soil, full sun and a location that will be undisturbed.
Time frame
Step 1
Fall is the best time to plant new rhizomes or bulbs, however established plants should be divided and replanted between two and eight weeks after they finish blooming. Iris bulbs can be planted in the spring, however they will not likely bloom that same year.
Geography
Step 1
Irises are found in every state, as the different varieties are hardy in different zones.
How to Plant
Step 1
Iris rhizomes need to be planted shallowly with the top either just buried or showing slightly through the soil. Bulb iris varieties should be buried completely just as any other bulb would be.
Step 2
- With more than 200 varieties of irises available, at least one is suitable for almost every yard or garden.
- Fall is the best time to plant new rhizomes or bulbs, however established plants should be divided and replanted between two and eight weeks after they finish blooming.