How To Use A Volt Ohmmeter To Test A 20-Amp Fuse
You can test a fuse using either a digital volt-ohmmeter or an analog volt-ohmmeter. The digital multimeter uses a LCD to indicate the condition of the fuse under test while an analog meter uses a traditional meter movement to indicate the fuse condition.
Using a digital multimeter
Step 1
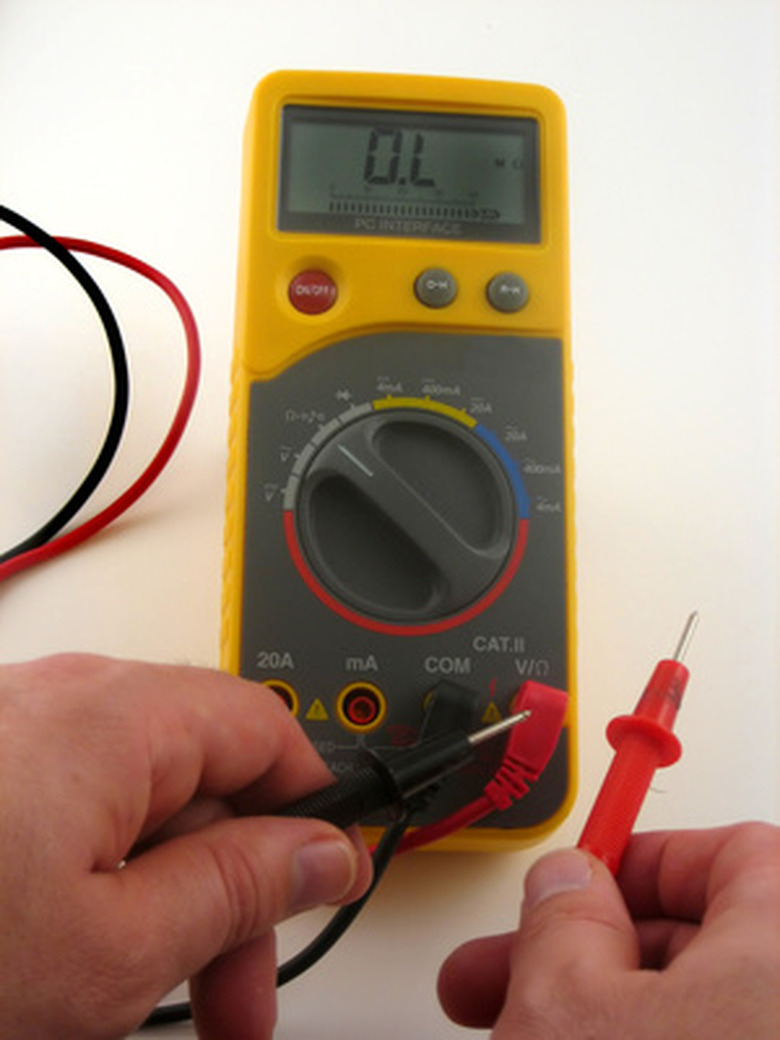
Connect the test leads to the volt-ohmmeter. Plug the black test leads into the black jack marked "Com" or "Common" on the front of the meter. Plug the red test lead into the red jack marked "Volts/Ohms" on the front of the meter.
Step 2
Set the meter's function switch to "Ohms" and the range switch to the "R x 1" scale. If your digital multimeter is an auto ranging meter, you will not have a range switch. Instead, you'll have just a function switch because the meter will automatically select the right range for the quantity that you are measuring.
- You can test a fuse using either a digital volt-ohmmeter or an analog volt-ohmmeter.
- Plug the red test lead into the red jack marked "Volts/Ohms" on the front of the meter.
Step 3
Turn off the power and remove the fuse to be tested from the circuit. Never test a fuse for continuity while it is still connected to the circuit that it is used to protect. If the circuit still has voltage, the meter will be irreparably damaged. If the fuse is still in the circuit when tested it is possible to get a false indication that the fuse is good if the meter gets a completed circuit through other circuit components. To be safe, always remove the fuse from the circuit before testing it.
Step 4
Touch the black test probe to one end of the fuse and the red test probe to the other end of the fuse. It does not matter which probe you touch to which end because fuses are not polarized. You are checking to see if there is continuity through the fuse element. A reading of approximately 0.5 on a digital meter's LCD indicates a good fuse. Most digital meters read their own internal fuses resistance, hence 0.5 Ohms and not 0.00 Ohms. LCD readout of "O.L." indicates no continuity through the fuse. The fuse is bad and needs to be replaced.
- Turn off the power and remove the fuse to be tested from the circuit.
- To be safe, always remove the fuse from the circuit before testing it.
Section two: Using an analog meter
Step 1
Connect the test leads to the meter as you did in step one.
Step 2
Set the function switch to "Ohms" and the Range Switch to "R x 1." All analog meters are manually ranging so you have to select the "R x 1" Ohms range.
Step 3
Repeat steps three and four from Section One.