How To Repair A Flooring Nailer
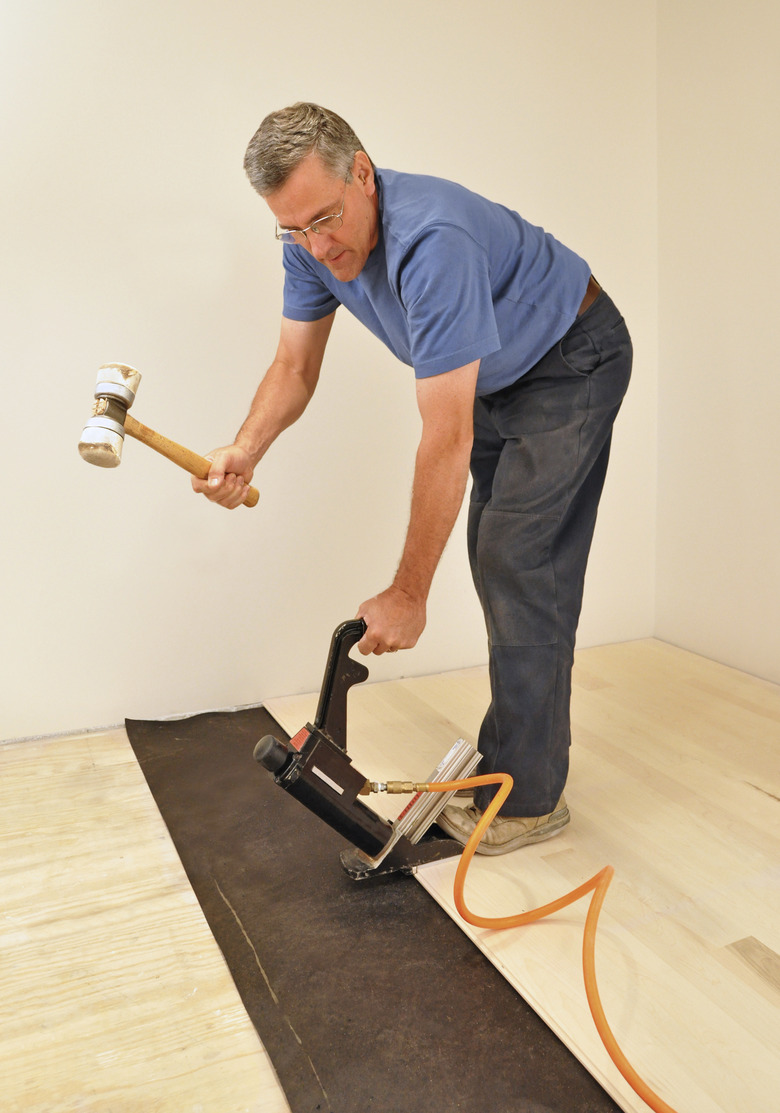
A flooring nailer is an almost indispensable tool for hardwood flooring installers. Both manual and pneumatic models are available, and both drive cleats at a 45-degree angle.
Things Needed
- Flat-head screwdriver
- O-rings
- Piston bumper
- Teflon tape
- Oil
- Piston shaft
- Nails
Christina Richards/iStock/Getty Images
A flooring nailer is an almost indispensable tool for hardwood flooring installers. Both manual and pneumatic models are available, and both drive cleats at a 45-degree angle. They function much like staple guns: A plunger pushes a cleat down a shaft and out the opening of the nailer with force when you strike the plunger with a heavy rubber mallet. Pneumatic models are air-assisted, so you don't have to strike with as much force to drive a cleat. These tools don't have many parts and are simple to service when something goes wrong.
Air Leak
Step 1
Pry off the plunger cap with a flat-head screwdriver. It is the rubber cap on the end of the plunge that absorbs the force of the mallet. Remove the O-ring under the cap.
- A flooring nailer is an almost indispensable tool for hardwood flooring installers.
- Pneumatic models are air-assisted, so you don't have to strike with as much force to drive a cleat.
Step 2
Release the plunger from the nailer, using a screwdriver to open the cap screws. Replace the O-ring on the piston in the plunger, and replace the piston's bumper as well. Place the plunger back into the nailer and tighten the cap screws.
Step 3
Place a new O-ring on top of the plunger and pop the whack cap back on. Tighten the air hose into the fitting on the body of the nailer, using a wrench and plumbing tape to seal the threads.
No Firing Power
Step 1
Empty the magazine that holds the cleats by releasing the spring-loaded holder and turning the machine on its end. The cleats should slide out.
- Release the plunger from the nailer, using a screwdriver to open the cap screws.
Step 2
Clear the discharge area of jams or blockages. This is where the air is discharged after a nail gets sent down. It's possible that a cleat is stuck there. If so, you should be able to work it out with a flat-head screwdriver. Be sure to disconnect the air before you do this.
Step 3
Add a few drops of oil to keep the air hose clear, with adequate pressure running to it.
Step 4
Fill the magazine with cleats, being sure they are all straight and their heads all fit properly into the guide. Replace the holder and engage the spring with the notch on the end of the magazine.
- Clear the discharge area of jams or blockages.
- Add a few drops of oil to keep the air hose clear, with adequate pressure running to it.
Tip
Check the parts of your nailer frequently for any damage or worn-out pieces.
Warning
If you have an air-powered nailer, always disconnect the air before making repairs.