How To Build A Shade Pergola Or Arbor
Things Needed
- 12x12
- Materials list
- (4) 6x6x14 Cedar Posts Rough sawn is best and available .
- (12) 2x8x14 Cedar Boards Smooth is Cost effective
- (30-40) 2x4x14 Cedar Boards
- (4) 5.75 inch post caps (see resources)
- (8)-10x1/2 inch Stainless Steel, Bolt Washer and Nut Sets preferably American Made for quality and longevity.
- 2 boxes of 2.5 SS inch deck screws, American made is easier to work with, they are a better quality steel and the heads won't strip as easily if you hit a knot.
- (10-20) Simpson Strong ties (see Resources)
- Tools needed
- 4 concrete stakes
- Concrete Pan
- Hand held Post Hole Diggers
- Rock Bar
- Shovel
- Tape Measure
- Black Marker
- Good Drill with a quality tipped screw bit.
- I/2x 12 inch ship auger bit ( available at most major hardware stores)
- Table Saw
- Skill Saw
- Jig Saw
- 12' step ladder
- Sledge Hammer
- Level
- Square
- String line
- string line level
- Ground Marking Paint
- Safety Glasses
- Pencil
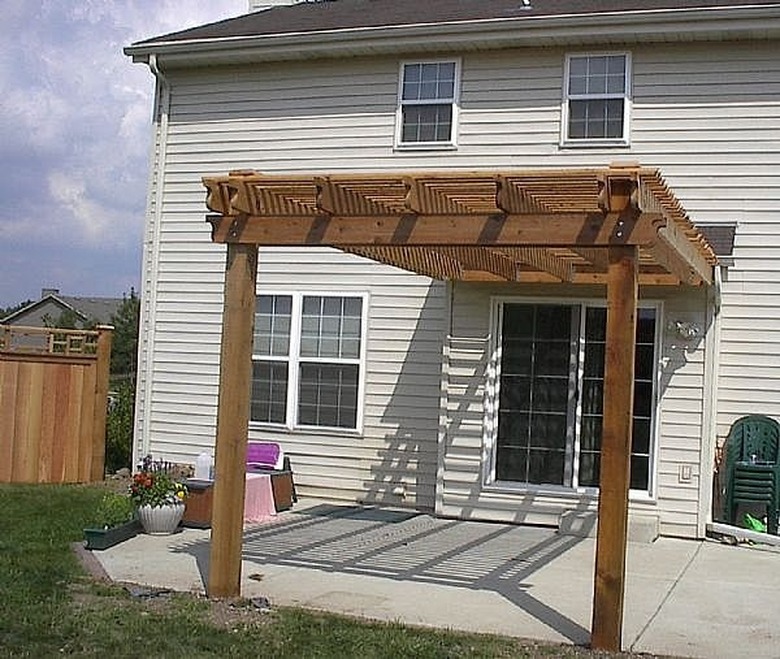
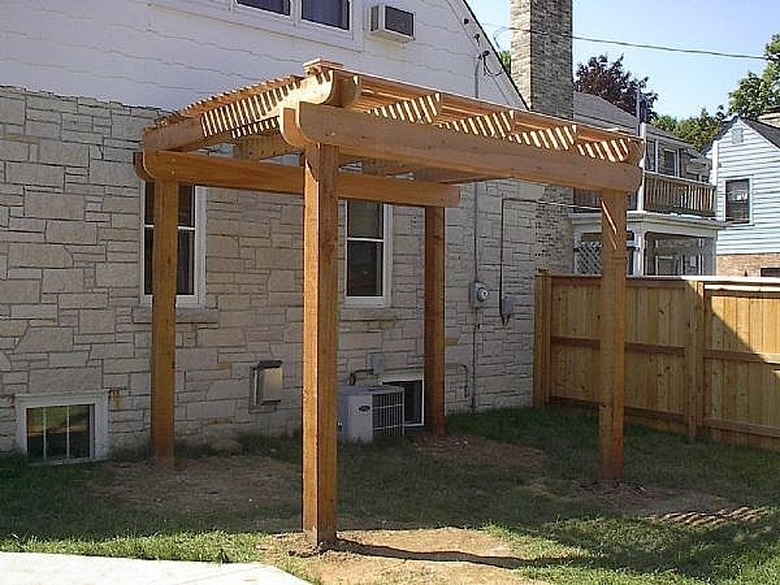
How to build [a professional shade pergola or arbor](https://www.gardenguides.com/how_6907467_stabalize-pergola.html) that will look good and last 20+ years. Whether you want to build for shade or just curb appeal these instructions can be adapted to any size project you have in mind.

Step 1
PREPARE THE SITE
Call Diggers Hotline to mark your area. If you are unsure where your private electric is to any outside structure get a private locate from them, it will be fee based. Otherwise the service is free.
Most municipalities require a permit and inspection when building this type of structure. Check with your city for their permit requirements prior to starting.
Step 2
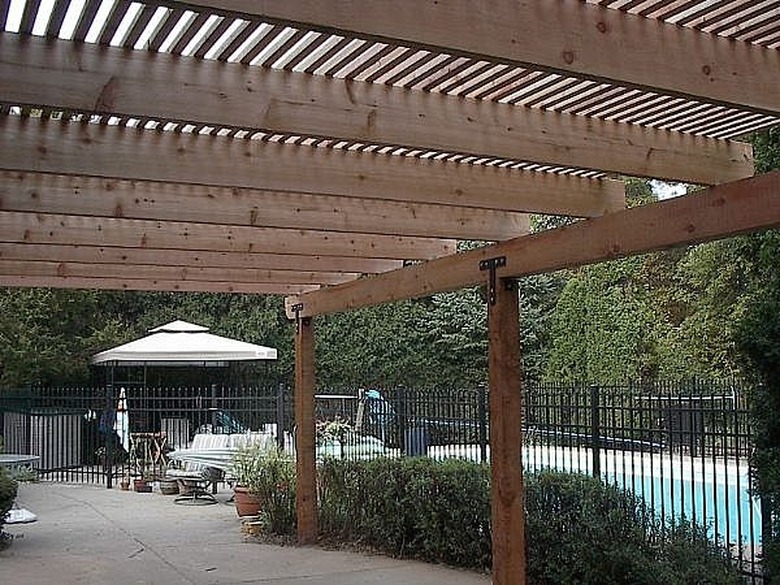
STAKE YOUR CORNERS AND DIG YOUR POST HOLES. Once you have prepared your site and planned your project you will need to stake your corners. Place your concrete stakes 1 foot outside your post layout area. Tie a string line tightly from one stake to opposite stake as shown. This establishes general corners for you to mark with paint and dig your holes. Leave the stakes in the ground and remove the string line. Dig four 8+ inch diameter holes 4 feet deep.
Step 3
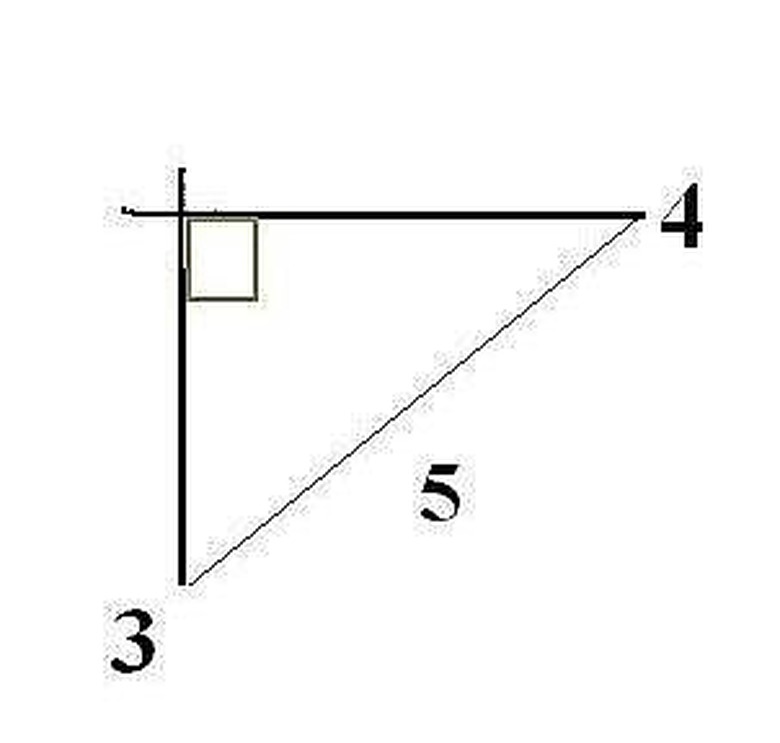
Square your corners. Re-tie the string lines in place. Take a tape measure and mark the string line with a marker from string corner out 4 feet, then it's intersecting line at 3 feet. Now measure between the two marks it should measure 5 feet if square, if not eyeball the stakes and move them until that measure is 5 feet. Do the same to all your corners.
Step 4
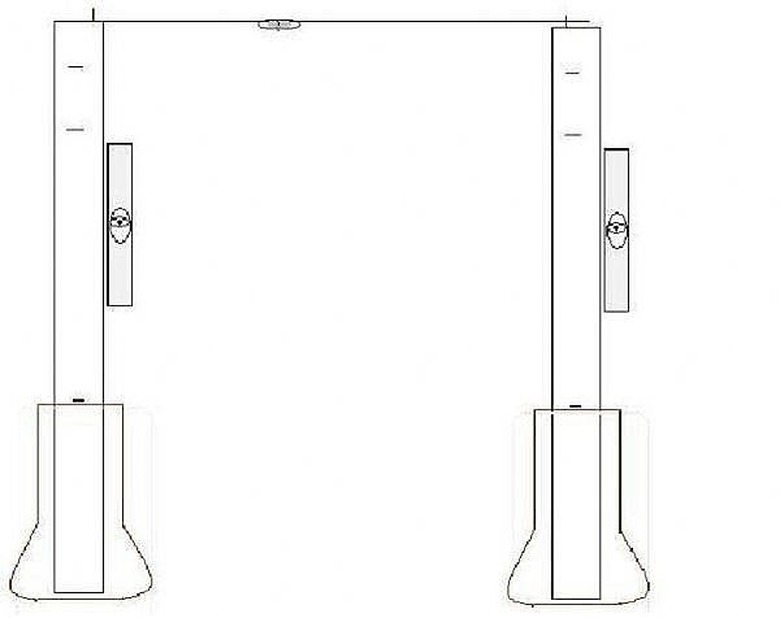
PREP YOUR POSTS Place a pencil mark from the base of the post 4 feet up, this is your ground mark. From the ground mark measure up 9 feet this is your rafter mark. Measure down 8 inches from the rafter mark, this is your beam mark. Measure up 8 inches from your rafter mark, this is your shade slat mark. You should have 2 inches left to mount the post cap. * _If your post is longer than 14 feet cut excess off the bottom before setting.
** If your post is shorter then 14 feet and you want your ceiling height lower, adjust measurements accordingly.
_ ** Note: 2x8 is a nominal measure – the true measure is generally 1.5"x7.5" so check your wood and use the true measure for your post markings.
Step 5
SET YOUR POSTS Place the first post in the hole at the corner of the highest grade (ground height), check the ground mark, adjust post up or down if the mark is not level with the ground.
Position post at string corners in a vertically level position ( two sides level or plumb. Mix concrete to a thick pour-able consistency. Fill hole with concrete two inches shy of the grade or ground level. Fill the balance with soil and tamp firmly with foot. Wash off any concrete on the post above ground level immediately so it will not stain the cedar.
Set second post in place, and attach a nail to the top, run a string line level between second post and the first post you set to verify you are setting all posts level on top — not ground level. (see image in the previous step). Do the same to each consecutive post.
Step 6
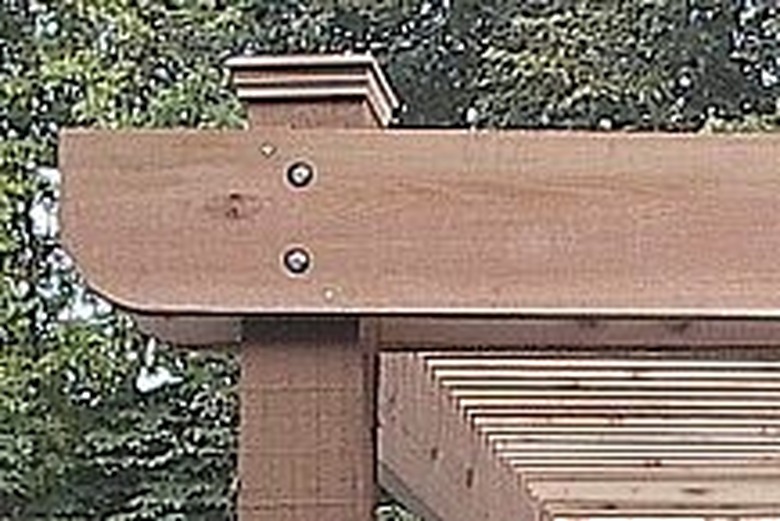
PREP YOUR WOOD Cut Beams and Rafters to length approximately 12 inches longer on each side of the posts. Your design will be cut out of this section of overhang on each end. Cut and rain-shed all the shade slats. Take your table saw and set it to rip the 2x4's in half. Once all the slats are ripped, rain-shed or dog-ear the slats. Set your table saw up with a 45 degree angle and take a small amount off two corners of the top edge. This rain-sheds water and protects them from rot. * _You may forego this step if you wish, but we recommend it since these are the first thing to fail on a pergola. ** Design your beams and rafters, any specialty cuts you want for design should be done prior to attaching them to your posts and beams._ ** We use several designs. Round ends: use a round object like a 1 lb coffee can lid for a guide, or a small lid if you want a partial round and angled design. You can also make a stencil out of stiff cardboard or other thin stiff material. Cut all boards with a jig saw.
Step 7
BUILD THE PERGOLA
MOUNT YOUR BEAMS
Mount the beams at the beam marks on the posts. One on the inside and the outside of the posts four in all. Make sure they are level to the ground and each other. ** Note: if you are building a shade pergola mount your rafters for optimum shade to the afternoon sun. Much of the shade will be East of the pergola depending on rafter height and location. Attach your beams. Nail them into place ( attach your nails away from where you are drilling your bolt holes) and drill your bolt holes, (two per post) equally positioned in the middle of each beam. Tap in your bolts, add washers and nuts, tighten firmly in place.
Step 8
MOUNT YOUR RAFTERS
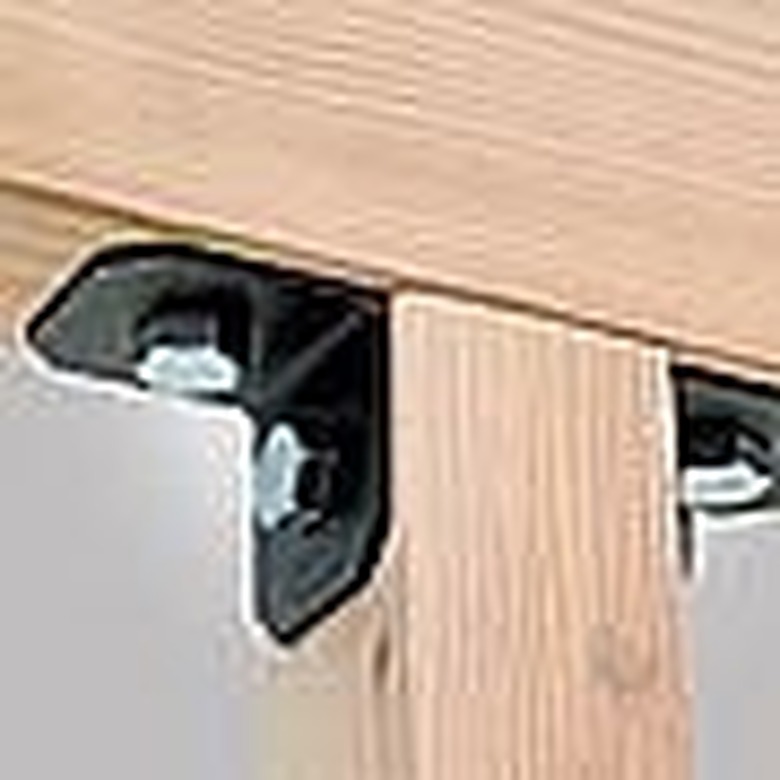
Measure between each post along your beams and equally divide that number by the number of rafters. 16 inch on-center is the maximum spread we use, anything smaller such as 12 inch is fine and easier to math for a uniformed look. Mark the top of each inside beam every (?) inches on both sides of the pergola for the rafter position marks.
Mount your Simpson Strong ties centered on these marks. Attach your rafters to the SS ties.
** Note: you can toe nail or screw the rafters into place if you prefer, we like to use Simpson ties for strength and longevity. We use the black architectural ones, but galvanized metal will do as well. You can paint them to match the cedar to hide the look. You can order either at Home Depot (see resources for model number).
Step 9
MOUNT YOUR SHADE SLATES
* _For optimum shade use a 50/50 spaced design.
Start on one side, inside the posts with a slat against the posts (do not attach this one it is a spacer) place the second slat firmly against the first. Screw second slat into place, a screw per rafter is best. Remove your first slat and move it into place by the attach one. (again a spacer) place the next slat firmly against the spacer slat and screw in place. Follow this procedure until all the slats are in place. When you get to the final 6 slats check to see if you will be ending with an equal end space, if not, adjust the final few slats closer together by fractions so you will end with a similar space as you began.
** If you want less shade use a larger board for spacing your slats. Remember to check as you get closer to the end, that the final space is the same as you began with or adjust by small increments accordingly._ ** You can pre-mark you slat positions with pencil before you begin to make sure the look is uniformed.
Step 10

MOUNT YOUR POST CAPS Use aluminum nails,(this prevents bleeding) screws will usually split the cap. Be careful when hammering the nails in place use a nail punch. Or if you have a finish nail gun use it.
Step 11
*** I have added resources for you to use for instruction illustrations and materials you will need for this project. This pergola will last a good 20+ years if you follow these instructions. It is strong enough to hang swings and hammocks from, or even walk on if you plan on using stain.
Tip
We recommend eye bolts for weight bearing furniture. Lags will weaken over time and pull out. TWP200-500 Stain is the #1 stain on the market for Cedar and will last 10 years before you will need to stain again – great for decks and fences as well, only available on the internet (see resources)
Warning
Do Not Paint Cedar it will rot from the inside out because it can't dry out! If you want a painted look buy an opaque stain.