How To Adjust Rain Bird Sprinklers
Things Needed
- Small flathead screwdriver
- Needle-nosed pliers
- Replacement spray nozzles
- Replacement filter screens
Dariia Havriusieva/iStock/GettyImages
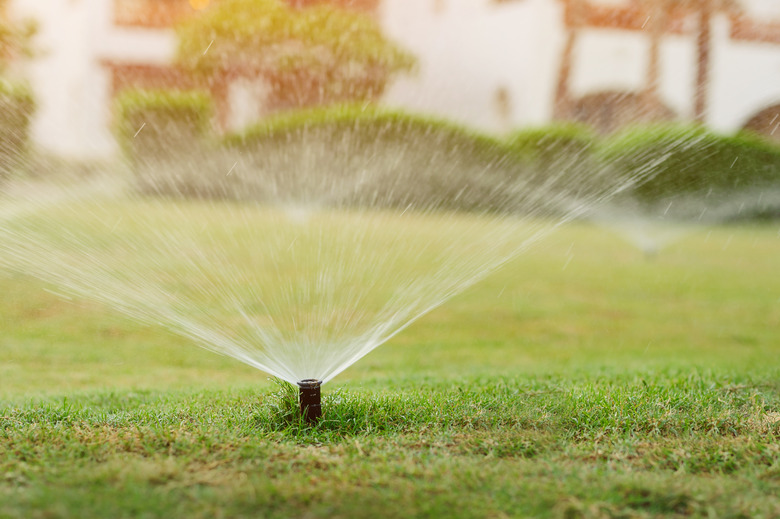
A typical Rain Bird home irrigation system consists of two types of sprinkler heads: sprays and rotors. Spray heads normally water small turf areas and shrub beds. Rotors distribute water over a larger area and usually irrigate large lawns or wide-open beds.
The Rain Bird sprinkler system head adjustment and rotor adjustment affect different coverage dimensions: the pattern, or arc, of the spray, and the distance of the spray. Green Mountain Turf Sprinkler Repair notes that, ideally, heads should be adjusted so that the spray patterns overlap each other so there are no dry spots over the irrigated area.
Before making any Rain Bird sprinkler system head adjustments, Rain Bird notes that you may only need to clean the stems or caps, or replace the filter screens if you notice your system begins to spray water shorter distances.
Adjust Rainbird Sprinkler Head
1. Observe Coverage Area
Turn on the water at the controller for the station in question. Determine whether the spray head is covering the intended area. If if it is not shooting wide enough or far enough, change the nozzle. If only a slight spray head adjustment is needed in direction or distance, skip to Step 4.
2. Remove and Replace Nozzle
Turn off the water. Grasp the nozzle of the spray head with needle-nose pliers and pull up until it stops. Grasp the shaft so it won't fall back down, and note the distance and pattern labeled on the top of the nozzle. For example, a nozzle labeled "10-H" will spray in a half-circle pattern at a distance of 10 feet. Determine a proper replacement.
3. Replace Filter Screen
Hold the shaft in one hand and unscrew the existing nozzle by turning it counter-clockwise with your free hand. Remove the nozzle and pull out the filter screen below it. Insert a new filter screen into the shaft opening. Install the new nozzle to the top of the shaft by turning it clockwise until it stops.
4. Check the Spray Distance
Turn the watering station back on and observe the spray distance and pattern. If necessary, grasp the shaft with one hand, and gently turn it either to the left or the right to adjust the direction of the spray pattern.
5. Adjust the Spray Distance
Reduce the the spray distance, if needed, with a small flathead screwdriver. Insert the end of the screwdriver into the small screw at the top of the nozzle. Turn the screw clockwise to reduce the amount of water thrown from the nozzle.
Rotor Head Adjustments
1. Observe Coverage Area
Turn on the watering station at the controller and determine what adjustments need to be made. If the rotor is not turning far enough to the right or left, adjust the arc. If the stream is only not reaching the proper distance, skip to Step 4
2. Adjust the Starting Point
Grasp the top of the rotor and with your hand, turn the cap clockwise until it stops. Next, turn it counter-clockwise until it stops. This will set the fixed left edge, or position from where the rotor will begin its rotation. Grasp the entire rotor shaft with one hand and turn it gently to the right or left to adjust the starting point, if necessary.
3. Increase or Decrease the Arc
While the rotor is turning clockwise, insert a small flat-head screwdriver into the adjustment screw, located at the 4 o'clock position if the cap were a clock face. Turn the screw clockwise to increase the arc. To decrease the arc, wait until the sprinkler head is turning counter-clockwise, and turn the screw in the same direction.
4. Increase or Decrease the Radius
Follow these instructions for how to adjust sprinkler head radius, or the distance of the stream, if the spray is falling short of where it should land. Insert the flathead screwdriver into the adjustment screw, positioned just above the rotor nozzle. Turn the screw down (clockwise) to reduce the distance. Raise the screw (counter-clockwise) to increase the distance.
Tip
If your sprinkler head is not popping up all of the way, or just doesn't seem to be throwing out enough water, you may need to remove the head and either clean or replace it. You can turn a sprinkler head completely off by turning the adjustment screw all clockwise until it stops.
Warning
Rain Bird sprinkler heads and screws will only turn as far as they are made to. Turning a head too far one direction may cause it to crack. Do not turn the rotor arc screw in the direction opposite of which the rotor is turning. This may damage the head.