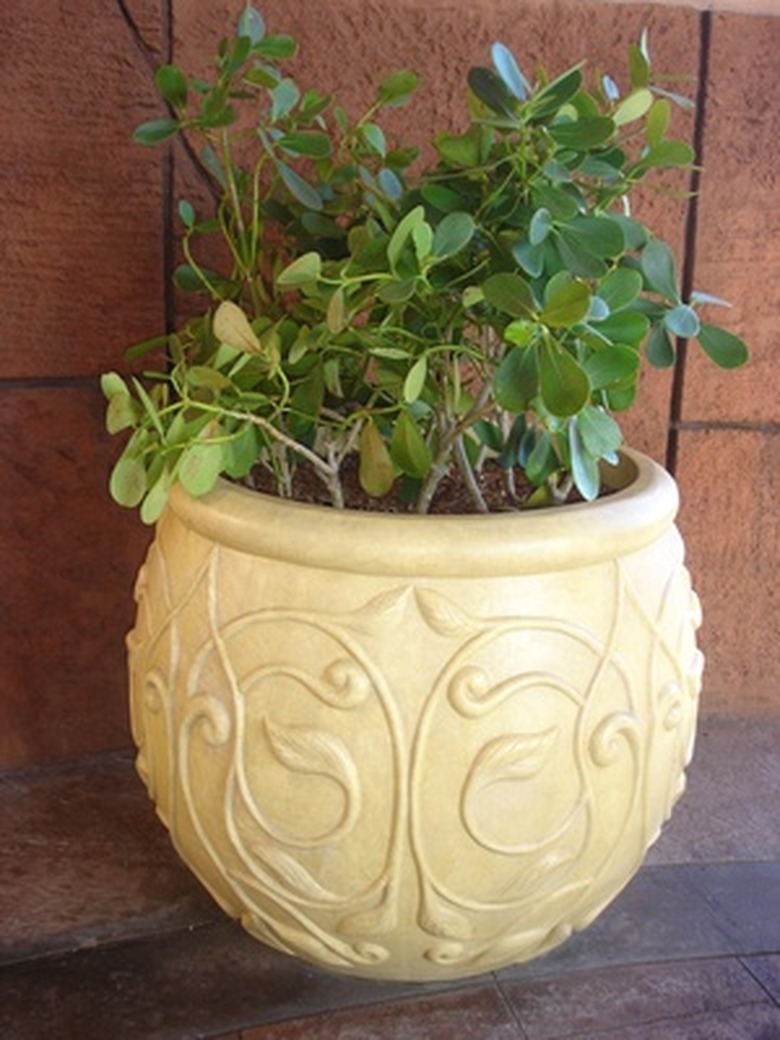
Potting Soil
Step 1
Bugs in potting soil and their eggs are best controlled before using the soil. Sterilizing the soil in an oven is the best method for killing off the small pests. While you can use a microwave oven, the most effective heating method is using a conventional oven. Large amounts of potting soil can be placed in large, heat-resistant pans. When complete, the potting soil is free of insects, eggs and weed seeds.
Step 1
Layer the potting soil in a shallow, oven-rated pan no more than 4 inches deep.
Step 2
Cover the pan tightly with a single layer of aluminum foil. Seal the edges of the foil to the sides of the pan.
- Bugs in potting soil and their eggs are best controlled before using the soil.
- Sterilizing the soil in an oven is the best method for killing off the small pests.
Step 3
Insert the oven thermometer deep into the soil through the aluminum foil in the center of the pan.
Step 4
Set the oven to between 180 and 200 degrees Fahrenheit.
Step 5
Heat the soil for 30 minutes once the thermometer has reached 180 degrees.
Step 6
Turn the oven off. Allow the soil to cool. Remove the pan from the oven. Use the soil immediately or keep it covered to use later. The aluminum foil cover will keep out insects from the sterilized soil.
- Insert the oven thermometer deep into the soil through the aluminum foil in the center of the pan.
- The aluminum foil cover will keep out insects from the sterilized soil.
Tip
During the heating process, the soil may smell bad. Sterilizing soil not only kills bugs and their eggs, it will also kill any remaining weed seeds that may be in the soil. Soil that has been placed in an oven can remain hot for a long time. Allow it to cool for a few hours before handling the sterilized soil.
Warning
Do not allow the soil to get above 200 degrees Fahrenheit, as this may produce plant toxins in the soil.
Step 1
Fill baking dishes or pans with no more than 4 inches potting soil in each pan.
Step 2
Cover the pans tightly with aluminum foil.
Step 3
Insert a meat thermometer into the center of one pan, pressing it through the foil and into the potting soil. If you do not have a meat thermometer, you can use a candy thermometer instead.
Step 4
Place the pan in the oven, and heat the oven to 190 degrees F. You can set the oven higher, up to 250 degrees, if you will be able to watch the soil temperature closely as it cooks.
Step 5
Bake the soil until the temperature on the thermometer remains at 180 degrees F for at least 30 minutes. Remove the soil from the oven after this time. The soil is now sterilized.
- Fill baking dishes or pans with no more than 4 inches potting soil in each pan.
- Place the pan in the oven, and heat the oven to 190 degrees F. You can set the oven higher, up to 250 degrees, if you will be able to watch the soil temperature closely as it cooks.
Tip
If the soil temperature begins to approach 200 degrees F, turn the oven down by 10 degrees. Plant toxins can be formed with high heat. Keep the sterilized soil in the covered baking dishes or package it in airtight containers until needed.
Step 1
Add moist soil to a roasting pan making sure the depth of the soil is no more than 4 inches. If the soil is completely dry, add a little water to moisten.
Step 2
Spread the soil in the baking dish and cover the pan with the foil. Stick the thermometer directly in the center of the foil and into the potting soil. Do not let the thermometer touch the bottom of the pan.
Step 3
Turn the oven on a very low temperature. The ideal temperature to sterilize plant soil is 160 to 180 degrees Fahrenheit. Digital oven settings are great, but for a standard oven, the "warm" setting works well.
- Add moist soil to a roasting pan making sure the depth of the soil is no more than 4 inches.
- Spread the soil in the baking dish and cover the pan with the foil.
Step 4
Maintain the baking process until the thermometer temperature reaches 160 to 180 degrees Fahrenheit. Make certain the soil temperature does not go above 200 degrees because this will cause any plant toxins in the soil to be released into the air.
Step 5
Cool the sterilized potting soil in the pan. Remove the soil and put in a sterile storage container until ready to use. The pan must be washed well to remove any contaminates from the soil.
Tip
Potting soil can also be sterilized in the microwave oven by heating 2 pounds of soil for two and a half minutes on high. Suggested wattage is 650. The soil should be allowed to cool slightly before removing from the microwave. Larger amounts of soil can be sterilized at one time as long as the soil depth in the pan is not over 4 inches. Do not forget to add the water if the soil is dry.
Warning
Open windows and doors when sterilizing potting soil as the smell becomes offensive to most people. Do not use a pressure cooker to sterilize potting soil; the cooker may blow up.
Things Needed
- Water (if necessary)
- Potting soil
- Bowl
- Deep baking dish
- Aluminum foil
- Baking thermometer
- Sterilized container
- Microwave oven (optional)
Yes, you may use potting soil as lawn soil. However, not all potting soil is created equally. Make sure the potting soil that you use includes a good combination of ingredients such as compost, sand and manure.
- Maintain the baking process until the thermometer temperature reaches 160 to 180 degrees Fahrenheit.
- The pan must be washed well to remove any contaminates from the soil.
Make Your Own Mix
Step 1
Screen the compost and the garden soil by placing the material on a 1/4-inch mesh screen and shaking. Put the bigger chunks back in the compost pile for further decomposition.
Step 2
Combine equal parts compost and garden soil. Add water until the mixture is moist but not soggy.
Step 3
Pile the mixture into a deep baking dish. Don't pack the mixture in because you want the steam made from the water to freely circulate. Cover it with foil. Put a meat thermometer through the foil into the mixture. Place the dish in a preheated oven at 200 degrees F.
- Screen the compost and the garden soil by placing the material on a 1/4-inch mesh screen and shaking.
Step 4
Check the temperature after 10 minutes, then every five minutes until the thermometer reads 170 degrees F. Turn off the oven and let the pan sit in the oven for an additional 30 minutes.
Step 5
Dump the mixture into a clean bucket with a lid for storage. Add sand to lighten the mixture, if necessary for the plants you are growing.
Mix from Store-Bought Ingredients
Step 1
Mix equal parts perlite, peat moss and compost.
Step 2
Add a handful of high-nitrogen fertilizer for every 5 gallons of the mixture.
Step 3
Mix in a 50:50 ratio of the mixed potting soil with garden soil for raised beds.
Tip
Skip the oven-heating step for healthy, established plants, but always sterilize the soil before you plant seedlings in it.
Warning
Don't let the mixture get above 180 degrees F. If there's a strong smell, the mixture has gotten too hot. The smell should be earthy, not foul.
Step 1
Fill a ziplock plastic bag with 2 pounds of potting soil. Leave the bag open to vent and place inside the microwave.
- Check the temperature after 10 minutes, then every five minutes until the thermometer reads 170 degrees F. Turn off the oven and let the pan sit in the oven for an additional 30 minutes.
- Dump the mixture into a clean bucket with a lid for storage.
Step 2
Microwave at full power at 650 watts for 2.5 minutes. Open the microwave and seal the bag closed when the cooking time is complete.
Step 3
Allow the soil to cool completely before removing from the microwave. Use the soil immediately or leave stored in the bag until ready to use.
Step 4
Check for toxicity in the treated soil. Toxicity is formed when the temperature gets too high and causes toxins to be produced. Plant five lettuce seeds in the soil and wait for germination. If the seeds do not germinate within five days, the soil must be disposed of. Try microwaving at a lower power the next time you sterilize.
- Microwave at full power at 650 watts for 2.5 minutes.
- Open the microwave and seal the bag closed when the cooking time is complete.
Tip
Avoid recontaminating your soil by using sterile planting equipment. Wash pots and spades in a solution of one part bleach to nine parts water to sterilize before use. Compost in potting soils may produce an unpleasant smell when being heated; this is normal.
Warning
Do not heat soils containing vermiculite, as this causes the vermiculite to change properties and possibly affect the plants. Avoid further contamination by storing the soil in the sealed plastic bag or moving it into a larger container with a tight-fitting lid.
The Azalea Society of America recommends a potting mix of equal amounts of a standard potting soil from your garden center and fine pine bark to achieve the proper pH.
Plants grow best in a medium designed specifically for them. Potting soil can be tailored to meet the specific needs of a plant with the right drainage and fertilizer mix, which ensures maximum growth.
Drainage and Aeration

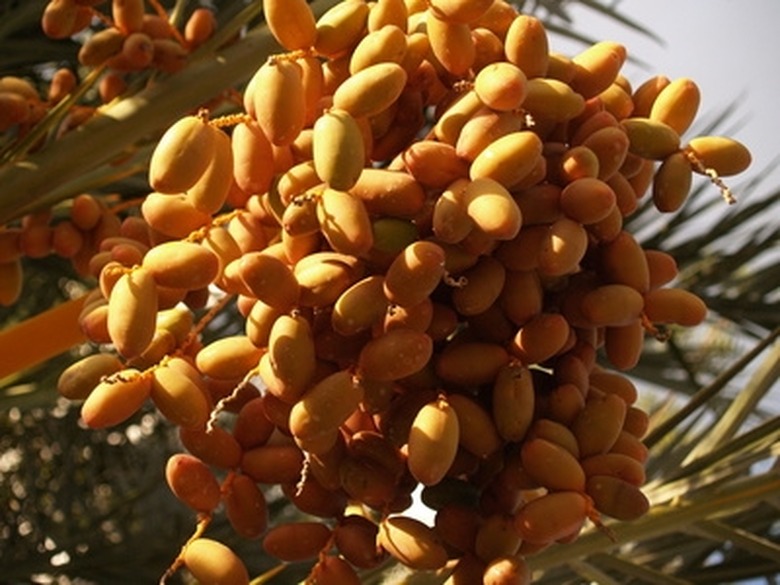
Step 1
Date palms naturally grow in sandy, well-drained soils. The palms also require good aeration around the roots. The trees cannot tolerate overly wet or compacted soils. Mineral content in the potting soil provides this aeration and drainage. Sand, perlite and vermiculite are the most common mineral ingredients in commercial potting soils. A mixture containing up to one-third of these components in a potting soil provides enough drainage for palms.
Step 2
- The Azalea Society of America recommends a potting mix of equal amounts of a standard potting soil from your garden center and fine pine bark to achieve the proper pH.
- Plants grow best in a medium designed specifically for them.
Moisture Retention
Step 1
While date palms need drainage, the potting medium should not be one that dries out completely. Peat moss and shredded bark both retain moisture without becoming overly soggy. Another option is ground coconut coir, which is the fibers between the outer husk and the meat of a coconut. Use up to one part of one of these materials to provide the proper amount of moisture retention in a palm soil.
Organic Material
Step 1
Organic material provides some moisture retention but is more important for the nutrients it provides. Organic material also adds weight to lighter potting mixes, which helps support the roots of the palm tree. Compost, sterilized soil and loam or humus all provide nutrient-rich organic material to the potting mixture. Compost and loam are not prone to sogginess like soil is. Use up to one part organic material in date palm soil.
Step 2
- While date palms need drainage, the potting medium should not be one that dries out completely.
- Compost, sterilized soil and loam or humus all provide nutrient-rich organic material to the potting mixture.
Function
Potting soils offer a nutrient-dense medium for the growth of both indoor and outdoor plants. Many commercial brands are sterilized to remove contaminants.
Types
There are soil mixes for nearly every type of houseplant or garden application. Each mix has been engineered specifically for that plant's needs whether it be acidic, loamy, well-draining or fertilizer-infused soil.
Ingredients
Depending on the type of soil, ratios of organics and inorganics will differ. Inorganics are added for drainage and fertilizing requirements–such as perlite, tree bark, sand and rock.
Cost
Low-cost potting soil often has a high inorganic additive ratio and does not give the same results as more costly premium soil.
- Potting soils offer a nutrient-dense medium for the growth of both indoor and outdoor plants.
- Inorganics are added for drainage and fertilizing requirements–such as perlite, tree bark, sand and rock.
Fun Fact
You can make your own inexpensive potting soil by mixing compost with inorganics.

Step 1
Step 1
Build the solarization tent. Lay a sheet of black plastic on a flat, solid foundation. Lay a wooden pallet on top.
Step 2
Place the old potting soil in piles, pots or bags on top of the wooden pallet. The soil should not be more than 1 foot deep. Water the soil to moisten it thoroughly.
Step 3
- You can make your own inexpensive potting soil by mixing compost with inorganics.
- Place the old potting soil in piles, pots or bags on top of the wooden pallet.
Step 4
Lay a sheet of clear plastic on top of the soil. Seal all the edges of the clear plastic to the black plastic using double-sided, heavy-duty tape to make it air-tight.
Step 5
Tent a second layer of clear plastic sheeting on top of wire hoops. Seal the edges of the second clear plastic sheet to the bottom plastic sheeting using the double-sided tape.
Step 6
Pry open a corner of the plastic sheeting and insert a thermometer into the soil to check the temperature every one or two days. After the soil achieves and maintains a temperature of 140 degrees F, you can remove the soil and use it.
Step 1
Step 1
Dump the old potting soil into a large wheelbarrow. Pick out any roots, and use a trowel or your hands to break up large clods.
Step 2
- Lay a sheet of clear plastic on top of the soil.
- Seal all the edges of the clear plastic to the black plastic using double-sided, heavy-duty tape to make it air-tight.
Step 3
Estimate the amount of potting soil in the wheelbarrow and divide it by four. Add that much perlite or vermiculite to the soil, and blend it well. Perlite or vermiculite will ensure that the soil is lightweight with good air circulation.
Step 4
Add the same amount of commercial compost or decomposed manure. Avoid using your own homemade compost, which may still contain seeds and pests.
Step 5
Place the restored potting mixture in a waterproof container, and use as desired.
Boiling Water
Step 1
Line a colander with paper towels.
- Estimate the amount of potting soil in the wheelbarrow and divide it by four.
- Add that much perlite or vermiculite to the soil, and blend it well.
Step 2
Fill the colander with your potting soil.
Step 3
Pour boiling water over the potting soil until it is soaked.
Step 4
Leave the colander full of potting soil in the sink to drain and return to room temperature.
Step 5
Fill your planting container with the cooled, still-moist potting soil and plant.
Oven
Step 1
Place moistened potting soil in a clay pot or other oven-safe container.
Step 2
Bake the soil at around 300 degrees F until a thermometer inserted into the middle of the soil reads 140. Keep the interior of the soil at this temperature for 30 minutes.
- Fill the colander with your potting soil.
- Leave the colander full of potting soil in the sink to drain and return to room temperature.
Step 3
Remove the potting soil from the oven. Allow it to return to room temperature before using it to plant seeds.
Asparagus grows best in a loose, well-draining potting soil, with a pH of 6.5 to 7.5. Use a potting soil containing lime, or add your own lime to generic potting soil, to create the higher pH level needed.
Step 1
Place 1 bushel of peat moss in a clean wheel barrow, or a large container such as a garbage can. Moisten the peat moss before incorporating the additional ingredients.
Step 2
Mix in 2 bushels of vermiculite, a sterile, porous, lightweight material that, when added to the peat moss, will help to retain moisture, nutrients and air.
- Remove the potting soil from the oven.
- Use a potting soil containing lime, or add your own lime to generic potting soil, to create the higher pH level needed.
Step 3
Add 1/2 cup of balanced, all-purpose fertilizer such as an 8-8-8 or 10-10-10 fertilizer. A balanced fertilizer will have equal amounts of nitrogen, phosphorus and potassium. Stir in 1/2 cup of garden limestone, which will help to maintain proper soil pH.
Step 4
Mix the potting soil thoroughly, then sift the mixture through a piece of hardware cloth to break up any large chunks. For general-purpose potting soil, use 1/2-inch hardware cloth. If you plan to use the potting soil to plant seeds, use finer, 1/4-inch hardware cloth.
Step 5
Store the potting soil in a large, airtight container or a plastic garbage bag.
- Add 1/2 cup of balanced, all-purpose fertilizer such as an 8-8-8 or 10-10-10 fertilizer.
- If you plan to use the potting soil to plant seeds, use finer, 1/4-inch hardware cloth.
Tip
Perlite can be used in place of vermiculite. Perlite will provide excellent aeration, but won't retain nutrients and water as well as vermiculite.
Step 1
Dump the old potting soil into a small bucket. Allow it to dry completely.
Step 2
Remove debris, dead leaves and roots from the old potting soil. Lift the root balls and shake over the bucket to collect the potting soil still attached to them. Set aside organic matter, such as leaves, to reuse.
Step 3
Place one part cow manure and one part composting material in a separate bucket. Use leaves from the old potting soil, crushed egg shells, old coffee grinds and other organic material for the composting items. Stir well with a stick. Allow the mixture to age or sit for 48 to 72 hours. Stir daily.
- Dump the old potting soil into a small bucket.
Step 4
Add an equal amount of the mixture (from step 3) to bucket with the old potting soil (from step 1). For example, fill up the bucket with the mixture if it's already half-full with the old potting soil.
Step 5
Add slow-release fertilizer for tomatoes to the bucket of old potting soil and compost mixture. It can be purchased from your local gardening store. Mix according to the manufacturer's directions.
Step 6
Stir the mixture contents well in the bucket. Fill potting containers and plant tomato seedlings or fill in gardening holes and plant tomatoes. Repeat the process when the tomatoes are finished growing and harvested.
- Add an equal amount of the mixture (from step 3) to bucket with the old potting soil (from step 1).
Tip
Re-use potting soil each growing season to save money and recycle. Add broken packing peanuts to recycle them and make the mixture less dense.
Warning
Always wear protective gloves when handling cow manure.
Things Needed
- Old potting soil
- Protective gloves
- Cow manure
- Compost material
- Slow-release tomato fertilizer
- 2 small buckets
- Stick