Decorative Trellises
Step 1
Kiwi plants are heavy bearers and need a strong trellis. The T-bar trellis described here is strong enough to support the vines and allows for easy harvesting. The fruit hang down below the trellis at eye height for easy harvesting. With this design, plant the kiwi below the center of the trellis and train the stem as a single trunk up to the middle wire. Then, train two branches down the middle wire. The fruiting branches will grow over onto the side wires.
Step 1
Dig post holes 15 to 20 feet apart and 2 1/2 to 3 feet deep using post hole diggers.
- Kiwi plants are heavy bearers and need a strong trellis.
- The T-bar trellis described here is strong enough to support the vines and allows for easy harvesting.
Step 2
Mix concrete with water according to the package instructions. Insert 4-by-4 posts into the holes, and fill the holes with concrete. Allow the concrete to cure for 24 hours before proceeding.
Step 3
Center the crossbeams on the top of each post. Use a brace to attach the crossbeams with nails or screws.
Step 4
Stretch a piece of #12 wire between the end posts, securing it tightly to the center of the crossbeam on each end. Stretch two more wires between the end posts secured at either side of the crossbeam, so that the wires are strung like an old-fashioned clothesline.
- Mix concrete with water according to the package instructions.
- Stretch a piece of #12 wire between the end posts, securing it tightly to the center of the crossbeam on each end.

Step 1
Plunge the base of the trellis into the soil of the philodendron pot. If you're using a large trellis outdoors, fasten it to a wall, fence or post. If your outdoor philodendron needs to be brought inside for winter, make sure that you set the trellis so you can bring it in along with the plant.
Step 2
Lift the body of the vine and set it onto the trellis where you want it. The philodendron doesn't send out tendrils like some other vining plants, but it may put out stubby "air roots" on occasion, especially if it is climbing a trellis made of wood. The leaves will also twist around to orient toward the sun; since the leaf stems are strong, this may help the plant cling to the trellis as well.
Step 3
Tie drooping vines into place with a soft, flexible plant tie. You can purchase these from a garden supply store, or just use green pipe cleaners. Do not to tie the plant to the trellis so tightly that you pinch the stem.
Step 4
- Plunge the base of the trellis into the soil of the philodendron pot.
- Lift the body of the vine and set it onto the trellis where you want it.
Step 5
Pinch or cut off any wayward vines that can't be guided onto the trellis. Cut or pinch just above where a leaf separates from the stem, then place the pinched-off section in damp soil to root.
Types of Treatment Chemicals
Step 1
Chemicals usually used to treat lumber are alkaline copper and quartenary ammonium, chromated copper arsenic, copper azole treatment and copper boron and creosote.
Warning
Step 1
All chemicals used to treat lumber are harmful to health. Arsenic is a well-known poison and all the other chemicals are carcinogens.
History
Step 1
In 2000, the Environmental Protection Agency (EPA) investigated the risks of timber treated with arsenic and found that human contact with the timber caused lung and skin cancer. In 2003, the U.S. Consumer Product Safety Commission released the results of its study that children who play on equipment made of treated lumber risk developing lung and bladder cancer when they become adults.
Step 2
- Pinch or cut off any wayward vines that can't be guided onto the trellis.
- In 2003, the U.S. Consumer Product Safety Commission released the results of its study that children who play on equipment made of treated lumber risk developing lung and bladder cancer when they become adults.
Alternatives
Step 1
Linseed oil rubbed on untreated timber, untreated red cedar, and recycled and plastic lumber consisting of chemical-free polypropylene are alternatives to treated lumber for a sturdy grape trellis.
Regulations
Step 1
The National Organic Program states that lumber treated with arsenate should not be used for tomato stakes or for a grape trellis.
Step 1
Plan the spot where you will install the fan trellis. It should be roughly 6 inches away from whatever climbing plant it will support. Gardeners often lean a fan trellis against some sort of structure (shed, house or fence).
Step 2
Loosen the soil carefully in the spot where you will install the trellis. If the climbing plant is already growing in this area, be very careful not to disturb the plant as you loosen the soil.
- Linseed oil rubbed on untreated timber, untreated red cedar, and recycled and plastic lumber consisting of chemical-free polypropylene are alternatives to treated lumber for a sturdy grape trellis.
Step 3
Push the fan trellis into the soil by grasping the trellis near the base and inserting it into the soil. Keep pushing until you have pushed the base of the trellis approximately 6 inches into the soil.
Step 4
Firm the soil gently around the base of the trellis. If the climbing plant has long enough tendrils, start to train the plant to climb the trellis by pulling the vines up and weaving them in and around the trellis.
Step 5
Add a thin layer of mulch around the plant and the base of the trellis to conserve soil moisture and make the planting area more attractive.
Things Needed
- Garden spade
- Shredded mulch (wood chips or bark)
Step 1
Set up your supplies on a level space, such as your driveway. Position five of the wooden boards horizontally in a row, with the ends evened up, about 2 inches apart.
- Push the fan trellis into the soil by grasping the trellis near the base and inserting it into the soil.
Step 2
Take the other five boards and set them in a criss-cross pattern, either diagonally or vertically, to create the trellis design. Make all the boards about 2 inches apart.
Step 3
Use hammer and nails to secure each top board to the one it is resting on below. Continue until you have made the trellis one piece, like a fence.
Step 4
Stain or paint the trellis in your desired color. Let dry.
Step 5
Tie each corner of the trellis to a wooden fence with galvanized steel wire, or else insert hooks from the hardware store into the wall or side of the house, right above where the climbing rose bush is planted in the ground and secure the trellis on the hooks. Make sure the bottom of the trellis is about 4 inches above the climbing rose.
- Take the other five boards and set them in a criss-cross pattern, either diagonally or vertically, to create the trellis design.
- Make sure the bottom of the trellis is about 4 inches above the climbing rose.

Step 1
Measure and mark the location for your trellis by hammering stakes into the ends of the desired trellis rows. Tie string between the stakes to mark the location of the trellis.
Step 2
Measure the length of your cattle or hog wire panels. Standard panels come in 16-foot lengths.
Step 3
Place a T-shaped metal fence post into the ground a distance matching the length of your panels along the length of the string marking your trellis location.
Step 4
Position the cattle panels so that they stand upright against the fence posts. Each cattle panel should touch the fence posts along its ends.
Step 5
- Measure and mark the location for your trellis by hammering stakes into the ends of the desired trellis rows.
- Position the cattle panels so that they stand upright against the fence posts.
Step 6
Attach the cattle panels to the fence posts using wire fence fasteners. Your trellis will now be sturdy enough to support the weight of your plants.
Step 1
Locate the studs in the wall in the general area the trellis will be hung.
Step 2
Place the trellis against the wall and determine where the mounting hooks will be placed. Mark the locations with a pencil. The hooks can go either on the sides or top and bottom of the trellis. The goal is to place as many hooks as possible into the wall's studs for added strength.
- Attach the cattle panels to the fence posts using wire fence fasteners.
- Place the trellis against the wall and determine where the mounting hooks will be placed.
Step 3
Check the places marked with a leveler to ensure they are completely even; otherwise, the trellis will hang crooked.
Step 4
Drill a whole one bit size smaller into the wall to prep the wall for the screws.
Step 5
Place the mounting hook over the holes and drill in the screws with a screwdriver bit on the drill.
Step 6
Hang the pot trellis and arrange the planting pots as desired.
Things Needed
- Stud finder
- Pencil
- Level
- Drill
- 4 mounting hooks
- 1-inch screws
Step 1
Plan the placement of the trellis. You will need one metal fence post placed every 3 to 4 feet along the length of the trellis. Lay each fence post on the ground where you will drive it into the ground.
- Check the places marked with a leveler to ensure they are completely even; otherwise, the trellis will hang crooked.
- Hang the pot trellis and arrange the planting pots as desired.
Step 2
Pound the fence posts into the ground using the post driver. Have your assistant hold the fence post erect while you pound the post drive over the top of the fence post to drive it into the soil. Drive each fence post at least 6 inches into the soil.
Step 3
Place the trellis along the fence posts, positioning the trellis so the bottom of the trellis is above the soil line (this will keep the trellis from decaying where it contacts the soil).
Step 4
Attach the nylon ties through the holes in the fence posts and around the trellis. Attach one nylon tie approximately 6 inches above the soil level and the other nylon tie approximately 6 to 10 inches beneath the top of the trellis. Attach two nylon ties to each fence post.
- Pound the fence posts into the ground using the post driver.
Step 1
Paint the trellis with paint primer. Allow the primer to dry completely, according to the package. Some primers dry within a couple of hours, while some require a full 24 hours to dry.
Step 2
Paint the trellis in the color of your choice. Use colors that match or complement the exterior paints of your home. Alternately, use a neutral color and accent this with small painted flowers or symbols where the rods or strips cross one another.
Step 3
String mini-lights or rope lights through the openings of the trellis. White lights are neutral, and match any decor. If you prefer, use lights that reflect your outside decor, or the holiday or occasion.
- Paint the trellis with paint primer.
- If you prefer, use lights that reflect your outside decor, or the holiday or occasion.
Step 4
Plant a climbing plant at the base of the trellis, and allow it to climb up the rungs of the trellis. Some examples are ivies, pothos, and climbing roses.
Step 5
Decorate the trellis for weddings or outdoor parties with long pieces of silk ribbon or swaths of light, flowing fabric. Organza and tulle are lightweight fabrics that dance in the breeze. Choose colors that match your party's theme.
Passion Flower
The passion flower family of plants are fast-growing tender tropical vines that bloom in the late spring and summer with fruiting following bloom. The fruits called maypops are edible and considered a delicacy tropical fruit by many. Passion flower is not finicky about soil nutrition, grows in sun or partial shade, is an aggressive climber, prefers moist soil and does not require fertilizing.
- Plant a climbing plant at the base of the trellis, and allow it to climb up the rungs of the trellis.
- The fruits called maypops are edible and considered a delicacy tropical fruit by many.
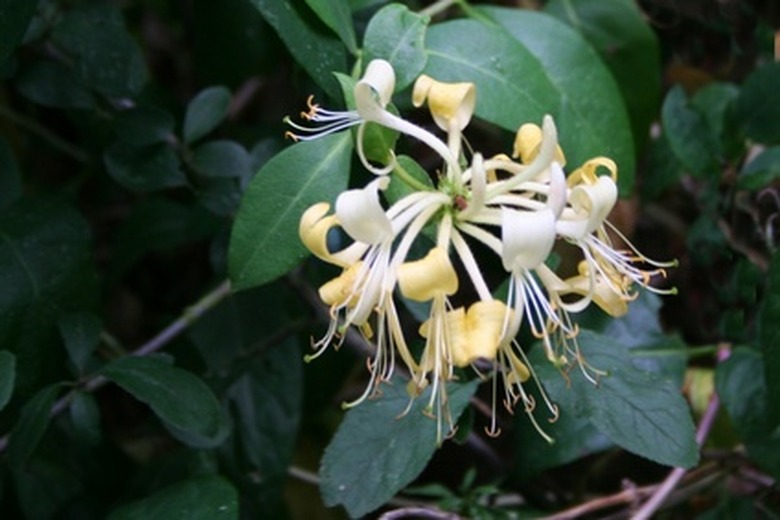
Honeysuckle
Honeysuckle is a classic and sweetly scented family of flowering vines. They come in a range of cultivars flowering in hues from white to deep coral. Honeysuckle is a semi evergreen vine that blooms in spring and throughout the summer. Honeysuckle nectar is a desired food source for hummingbirds and the vines produce small fruits in the fall that attract birds.
Clematis
Clematis is another large family of plants with species that bloom in a wide range of colors, variegated patterns and different petal shapes. Many varieties are long season bloomers flowering from spring up until the first frost. It thrives in sun and partial shade and prefers moist soil and cool roots covered by underplanting or mulch and protection from harsh winds.
- Honeysuckle is a classic and sweetly scented family of flowering vines.
- Honeysuckle nectar is a desired food source for hummingbirds and the vines produce small fruits in the fall that attract birds.
Step 1
Prune back the top portion of the plant when grown up a trellis or fence to within a foot or two of the ground. This will produce vigorous growth but no flowering in the spring.
Step 2
Cut back one-third of the honeysuckle vine from the top of the vine and leave some of the older branches, to reduce the vigorous growth of the plant and to encourage flowering.
Step 3
Apply an organic mulch to the base of the vines in the spring and water the mulch to encourage the vines to grow again. This reduces weeds and helps the vines recover after an extreme pruning.
Tip
If pruning is too time consuming, or the honeysuckle vines has been left to grow for several years as groundcover, cut away at the vines using a rotary lawn mower. Cut back to 4 to 6 inches in length in the early spring after the danger of frost has passed.
Step 1
Select a site to plant your crossvines. They need full sun or partial shade. Along a stone wall, fence, railings and trellis are ideal places for crossvines to thrive.
- Prune back the top portion of the plant when grown up a trellis or fence to within a foot or two of the ground.
- Cut back one-third of the honeysuckle vine from the top of the vine and leave some of the older branches, to reduce the vigorous growth of the plant and to encourage flowering.
Step 2
Add organic matter to your soil, if necessary. Crossvines need well draining, rich soil. Till your soil about 8 inches deep and add several inches of the organic matter, such as peat moss or compost.
Step 3
Dig a hole a deep as the crossvine container, but two times as wide. Set your plant in the hole and back fill with soil. Pat it down to remove any air pockets.
Step 4
Space multiple crossvines 10 to 20 feet apart. They will grow to fill in the gaps over the next few seasons.
- Add organic matter to your soil, if necessary.
- Till your soil about 8 inches deep and add several inches of the organic matter, such as peat moss or compost.
Step 5
Fertilize crossvines twice a year. In late winter, use a fertilizer labeled 5-10-5 and in mid-summer, use a slow releasing fertilizer labeled 12-6-6. Always follow manufacturer directions for dosing as each brand of fertilizer has different potencies and release rates.
Step 6
Prune cross vines, if desired. Crossvines will spread quickly and soon get out of control if left on its own. After the flowering season, just pull the vines with your hand and use clippers to thin them out.
Step 1
Step 1
Put on a pair of garden gloves. Gently remove any vines that are wrapped around the flowers. If the vines are too tough to remove without damaging the flowers, carefully cut them into smaller pieces with pruning shears.
Step 2
- Fertilize crossvines twice a year.
- Crossvines will spread quickly and soon get out of control if left on its own.
Step 3
Follow the vine to the soil and dig up the roots with a spade. Remove as much of the root system as you can to prevent any regrowth.
Step 4
Gather any flowers or seeds from the vines, and dispose of them in the trash along with the vines and roots.
Step 5
Place a layer of mulch around the flowers 2 to 4 inches deep to reduce future vines and weed growth. Try wood chips, straw, sawdust or other organic materials.
Step 1
Cut the grape vines at 4 to 5 feet above the ground with pruning shears.
Step 2
Cut the vines where they grow out of the soil with pruning shears. Get every vine, as even the smallest one could turn into a problem within a year. Discard the vines in a garbage bag.
- Follow the vine to the soil and dig up the roots with a spade.
- Cut the vines where they grow out of the soil with pruning shears.
Step 3
Apply an herbicide to the stumps of the vines. Follow the directions on your particular herbicide for best results. Repeat once a month until the vines stop growing.
Step 4
Plant trees or shrubs near the grapevines to block sunlight. The vines will not be able to survive if they are in a shaded area.
Things Needed
- Pruning shears
- Garbage bag
- Herbicide
- Trees or shrubs
Step 1
Watch the flowering vine for more than one season. Most vines are perennials and come back year after year, but moon flower, morning glory, bittersweet and morning glory are annuals. They may self-seed, but the new plants will probably not grow in exactly the same place they grew the previous year.
- Apply an herbicide to the stumps of the vines.
- Plant trees or shrubs near the grapevines to block sunlight.
Step 2
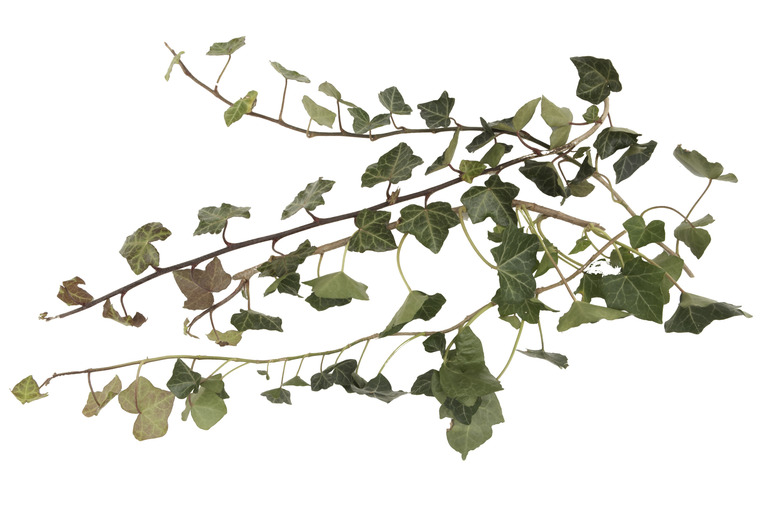
Inspect the vine to find the method it uses to attach itself to structures. Wisteria, honeysuckle and bittersweet twine around the support; clematis and passion flower spout tendrils that wrap around supports; trumpet vines and hydrangea cling by aerial rootlets.
Step 3
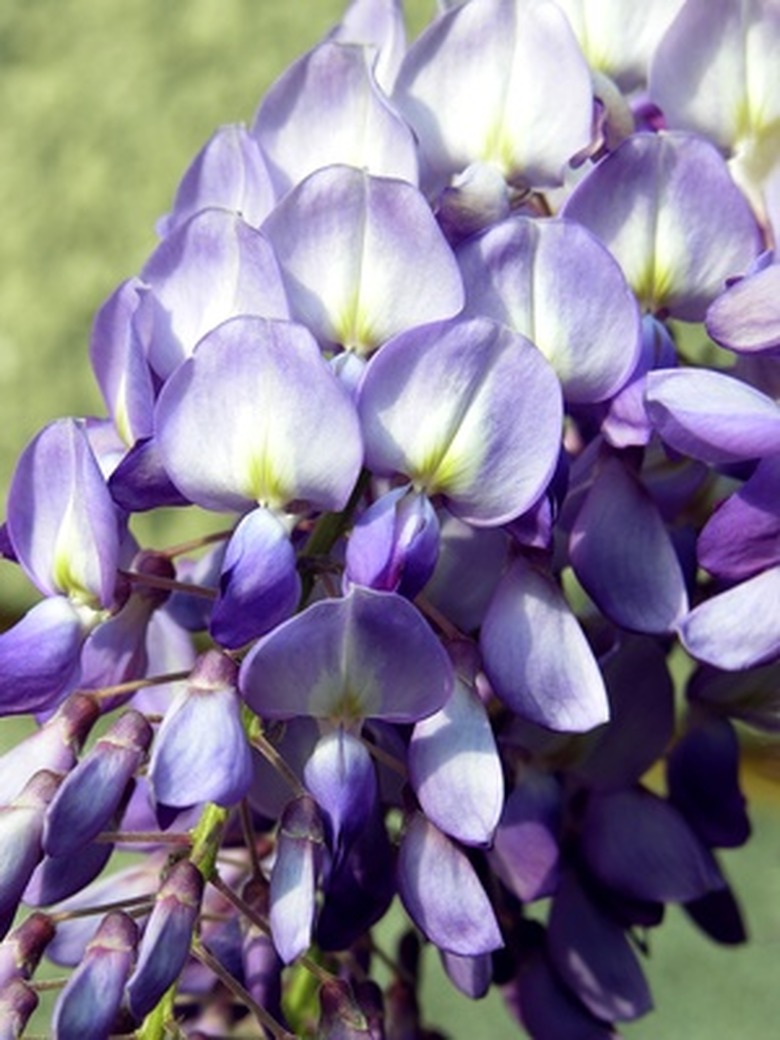
Smell the flowers of the vine. Honeysuckle, passion flower, jasmine and wisteria are known for their fragrance.
Step 4
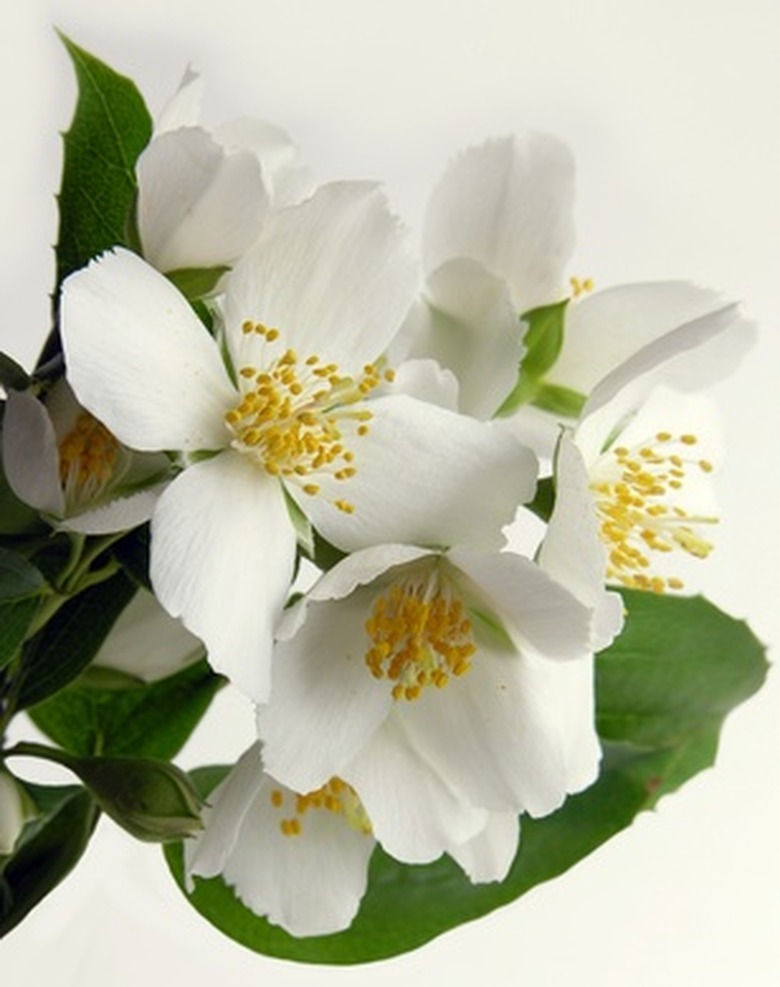
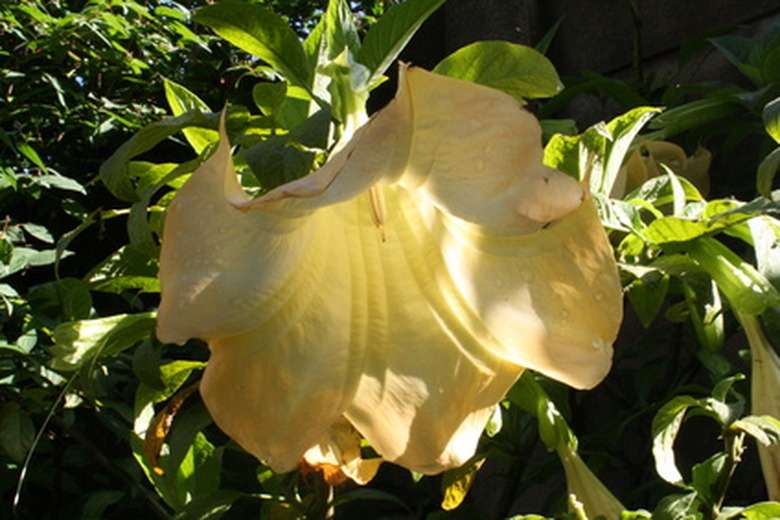
Inspect the flowers. Clematis, jasmine, morning glory and moonflower have large showy flowers. Honeysuckle, hydrangea, jasmine and wisteria have clusters of flowers. Trumpet vines have distinctive trumpet-shaped blooms.
- Inspect the vine to find the method it uses to attach itself to structures.
- Honeysuckle, hydrangea, jasmine and wisteria have clusters of flowers.
Tip
Most vines grow well in full sun and well-drained soil. Check with a nursery specialist for the specific growing requirements of your vine.
Step 1
Inspect your grapevines closely several times over the winter to identify dead vines and those that branch toward the center of the plant rather than outward. In winter, the vines go dormant and diseased and dying vines are easier to spot.
Step 2
Wait until at least Feb. 15 to prune your vines in Georgia. In the northern mountains, wait until just after the last expected frost. The goal is for the vines to still be in the dormant stage but not to have any further climate challenges after pruning.
Step 3
Prune back all dead vines to the main vine on a 45-degree angle. Also prune back vines with leaves that have signs of black spot or white powdery mildew. Dispose of diseased vines by burning to ensure that the disease cannot spread further.
- Inspect your grapevines closely several times over the winter to identify dead vines and those that branch toward the center of the plant rather than outward.
Step 4
Stand back and view the vine from a distance. If you are training the vine up a trellis, you will keep strong vines that extend straight out from the main stem. These vines will be attached to the trellis and trained upward. Any vines that grow inward or are crowding other vines should be pruned back to the main stem to allow the others space and light to grow strong and healthy.
Step 5
Prune all vines back to a 2-foot length in the case of a vine that has been allowed to grow unchecked. This will stimulate strong new growth that you can train to a trellis or fence.
Warning
Grapevines should never be pruned back in the fall or early winter.
Things Needed
- Grapevines
- Sharp pruning shears
- Trellis or fence (optional)
Step 1
Decide what size you want your wooden posts to be (generally between 4-8 feet tall). Shorter ones are best for places with harsh winters. Eight-foot-tall trellises are ideal for any type of vine, as you can always add on height or width once it grows larger.
- Stand back and view the vine from a distance.
- If you are training the vine up a trellis, you will keep strong vines that extend straight out from the main stem.
Step 2
Pound two posts into the soil about 2 feet deep with the mallet, 3 to 4 feet apart. Space multiple sets about 10 feet apart.
Step 3
Position the anchor post next to the main post, angling it away. Attach the heavy 12-gauge wire tightly between the main post and anchor. For a two- to three-post trellis, an anchor post at either end is fine. This will help keep the heavy 12-gauge wire taut.
Step 4
Pull the heavy wire about 3 to 4 inches up from the ground along the length of the trellis. Run another length of the wire 1 foot up from this point. Secure the wires to the posts by wrapping them and positioning with clamps.
- Pound two posts into the soil about 2 feet deep with the mallet, 3 to 4 feet apart.
Step 5
Use lengths of the lighter catch wire between the two lengths of heavier wire. Wrap the lighter wires around the heavy ones, spacing them several inches apart. These are to help train the vines and make pruning easier. Use pruning scissors to trim off any awkward angles or sharp ends.
Step 6
Plant the vines right at the base of the main posts. Secure the main vine to the heavy wires with plant ties loosely. Wrap the vines or smaller branches around the catch wires.
- Use lengths of the lighter catch wire between the two lengths of heavier wire.
- Wrap the vines or smaller branches around the catch wires.
Things Needed
- Wooden posts, 3-4 inches in diameter
- Mallet
- 12-gauge wire
- Catch wire
- Anchor posts
- Pruning scissors